REMEMBER: when you open your website you need to update the location of the files, even if the location seems correct it will be linked through a different computer.
IF you want your website to be centrally aligned you can apply a code to the #container. You add, left:50%; right:50%; margin-left:-512px; (half of the width).
To create a template we add editable regions. These areas will change on every page whilst the top bar will not.
If you have an issue with the design view you can add the code here...
When you go to save make sure these changes are saved as a template. When the update links prompt is asked select yes.
HOW DELETE THE INDEX.HTML FILE!
Choose a new template from the New... tab and select your template. Then save the template as the page name you want. Do this repeatedly for every page.
You should have multiple tabs which look like this. Remember to call your 'Home' page 'Index'.
The template.dwt file can be edited and all pages wil be updated. This concludes the building of the website, all the designer really needs to do now is create content and add this into the template...
Use photoshop (image size) to edit your images for use on the website.
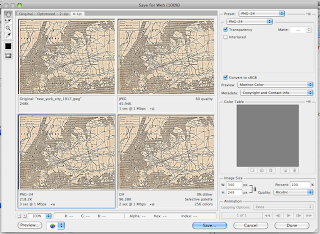
Then save the image: Save as a jpeg or PNG. PNG allows for transparency. Quality 50 is usefull.

Select Insert> Image to add an image to a selected editable area.
This box will allow the user to add a description of an image to the website when the image is rolled over. This is important to the blind.
Start creating images for the buttons in photoshop using the correct dimensions. And resolution.
This will be button one and button two.
To insert a button select the area you want it to go and click Inset> Image Objects> Rollover Image.
Choose the perimeters for the images here, very straight forward.
This will add javascript into the HTML code.
Save the file, this prompt will appear. Select Update.


No comments:
Post a Comment